Saturday, January 23, 2010

Moroccan Beef Tagine

For Christmas of last year, Pop gave John and me our first ever authentic Moroccan tagine. Our culinary gift collected dust for about 3 weeks until we broke it in with the following. (The original recipe called for lamb, but since we had purchased some wonderful beef stew meat, we used that instead.)


I found a great site for Moroccan food and went to work.

I will insert the recipe here in a few days. The site is taking forever to load.

One note on the recipe - the apricots added a great deal of sweetness to the dish. The flavors were very nice, but the dish was slightly sweet for John's and my taste. The orange juice, while a nice touch, seemed to add nothing to the dish in terms of flavor; maybe food science has something to do with its inclusion in the recipe.

Sautéing the onions in olive oil


The tagine with all the ingredients prior to simmering


Simmering:)


Posted by Sara

Monday, January 18, 2010

A Russian New Year

This year, I wanted to start incorporating some Russian traditions into our New Year's celebration, motivated partly by nostalgia for my time spent living there, and by my love of Russian cuisine. I went with the zakuski tradition this year, making a spread of various salads and appetizers I remember from Russia. New Years is the primary winter holiday in Russia, having surpassed Christmas during the Communist era and incorporating many of its traditions. For example, our Christmas trees are New Year's trees in Russia.

This year, I made Salat pod shuboi (lit. "herring under a fur coat"), vinegret, mushroom zakuski, and eggplant caviar. I also served pickled tomatoes, mushrooms, seledka and olives, and caviar on bread and butter. Everything turned out fairly well, but next time I will definitely cook more hot dishes and maybe fewer salads.

The recipes are easy to find online if anyone is interested in trying them out. The Salat pod shuboi is my favorite, but it also requires the most time, since it involves creating several layers. The results are rewarding, though.

Here are a few pictures of our New Year's table:


Posted by Sara

Saturday, December 12, 2009

Cake Repair, Part 3 - the Presentation


Cake Repair, Part 2

On the day Mom had to take Becky back to college (or at least half way), Pop was left to finish the repair job solo.

Step One:  Gather ingredients . . .
Home made frosting with cream cheese (he didn't take a picture of the cream cheese, sorry) - vanilla and powder sugar


Then he frosted layer one - the bonus layer...


And Finished Product "notice the Hebrew" - in the freezer to wait for the
return of the Anniversary couple....


Saturday, December 5, 2009

Cake Repair, Part 1

The Anniversary Cake - attacked by "Pop" for a midnight snack once upon a time.... and since the anniversary is near - repair is necessary...


The Damages up close:


So here we go - Cake Repair: Part One 


Step one: prepare necessary parts . . .

One piece for "filling" and another for the new "bonus" base layer.

Step Two, cut out "new" center for cake, and attempt to plug-hole...


Level the Surface as much as possible...


Install parts...


  And then level the field again . . .


melted original icing to use as glue (. . . I mean, "filling")


Final trim . . .


and new layer gets to rest in the freezer....until tomorrow (when we take up Part #2)


Saturday, November 21, 2009

Crème caramel

An instructional video done by some cuisine-saavy Canadians was the inspiration for this dish. They explain the dish much better than I, and after watching it a couple of times, I made the dish without using a written recipe.


You need to plan ahead because the dessert needs to chill for at least a few hours.

You will need only five ingredients- milk, eggs (a lot of them), sugar, vanilla, and water. Notably, we used half measurements of the video's instructions, because my soufflé dish is smaller.


First, you start a half quart of milk on the heat - it should boil, but only slightly, with some small bubbles around the edges of the milk - not a rolling boil like you are making pasta. Put your milk on medium heat and watch it carefully.


Put about a 
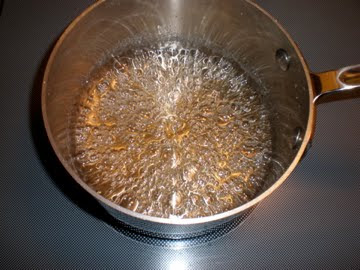
half a cup of sugar (or 1 cup if you are following the video) into a pan and wet it - you don't want lots of water standing above the sugar.


Put the sugar and water (your future caramel) on medium-low heat. The caramel easily burns, so as soon as it turns a beautiful golden brown color, take it off the heat and swirl it in the air so that it does not burn.

Prepare a 
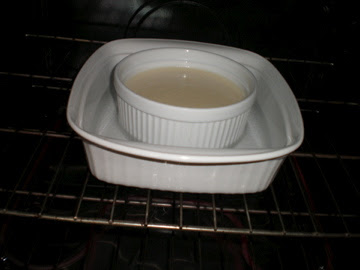
bain-marie (a water bath) in your oven. This is easy - find a dish that your soufflé dish will set into, set water to boil, and then pour boiling water into it - to a level that will surround your dish to the 1/3 point or so. The video makes this very easy to understand.

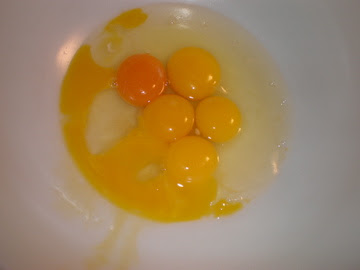
The oven should be at 400F. While your milk is heating and your caramel is bubbling, crack 6 eggs (or 12 if you follow the video) into a large bowl. Our eggs were from the farmer's market, so some of the yolks are a beautiful darker color and stand out from the others.


Temper your eggs with the milk (gradually add milk a few times and stir, so that you do not cook the eggs). Beat the eggs until white peaks form. Once the eggs are beaten, add a teaspoon or so of vanilla. I say "or so" because I love vanilla and usually add more.

Your caramel should be done (or maybe it was done already). Take it off the heat, and pour it into the bottom of your soufflé. Gently tip the dish around so that the caramel coats the bottom of the dish and about 1/4 of an inch on the sides.

Pour your egg mixture into the dish.

Place your soufflé dish into the bain-marie.


Close your oven:) Wait for an hour.
Put it in the refrigerator and be sure not to touch it for at least 4 hours. I waited 6.


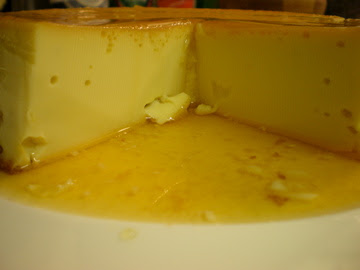
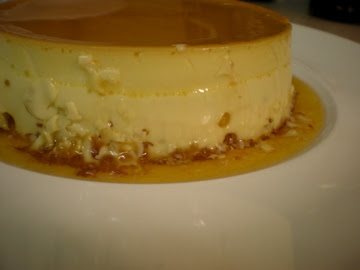
Take out your beautiful crème caramel and sigh at its loveliness.


After this time, take out the dish and cut around the outside of it with a knife, place an upside-down plate on top of the dish, turn it over quickly onto the plate, being careful not to break the mold.


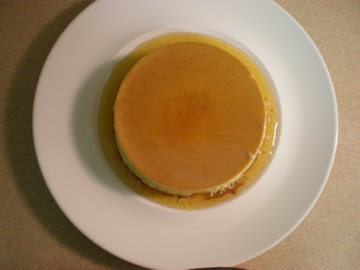
You should have a beautiful crème caramel.


Posted by Sara

Wednesday, November 4, 2009

John's Fish Dinner

Inspired by reading Julia Child's tales of fish-eating in France, (usually full of butter & white wine references) we decided to cook an experimental fish in similar style guided by intuition...yes, instead of a recipe.

You need: fillets of white fish of your choice, fresh lemon, parsley, garlic, white wine, butter, salt and pepper.

Steps: Warm butter in your pan and sear the fish so it is slightly brown on both sides. Remove the fish to a warm oven. Deglaze the fish pan with white wine. Add a bit more butter, lemon, and garlic to your taste. Simmer and reduce until it is the consistency you like for a sauce. Add salt and pepper to taste. Pour over the fish and garnish with parsley. We served the fish over Israeli couscous, but you could use a bed of greens or grain of your choice.


Our fish in the pan (you should have a bit less butter in searing than this picture shows)


John putting the fish to warm in the oven.


Our reducing fish sauce. You could also add some flour to thicken this, but we went lighter.


John pouring the sauce over the fish


The beautiful result


Our dinner - fish with couscous, green beans, bread...


Posted by Sara