
Saturday, December 12, 2009
Cake Repair, Part 2
On the day Mom had to take Becky back to college (or at least half way), Pop was left to finish the repair job solo.
Step One: Gather ingredients . . .
Home made frosting with cream cheese (he didn't take a picture of the cream cheese, sorry) - vanilla and powder sugar


Then he frosted layer one - the bonus layer...


Step One: Gather ingredients . . .
Home made frosting with cream cheese (he didn't take a picture of the cream cheese, sorry) - vanilla and powder sugar


Then he frosted layer one - the bonus layer...

And Finished Product "notice the Hebrew" - in the freezer to wait for the
return of the Anniversary couple....

Saturday, December 5, 2009
Cake Repair, Part 1
The Anniversary Cake - attacked by "Pop" for a midnight snack once upon a time.... and since the anniversary is near - repair is necessary...

The Damages up close:


Step one: prepare necessary parts . . .
One piece for "filling" and another for the new "bonus" base layer.
Step Two, cut out "new" center for cake, and attempt to plug-hole...

Level the Surface as much as possible...

Install parts...
 And then level the field again . . .
melted original icing to use as glue (. . . I mean, "filling")

Final trim . . .

and new layer gets to rest in the freezer....until tomorrow (when we take up Part #2)

Saturday, November 21, 2009
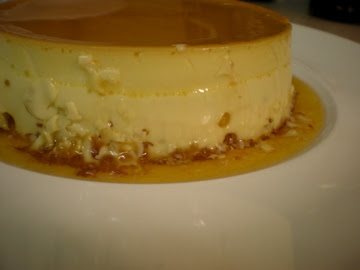
Crème caramel
An instructional video done by some cuisine-saavy Canadians was the inspiration for this dish. They explain the dish much better than I, and after watching it a couple of times, I made the dish without using a written recipe.
You need to plan ahead because the dessert needs to chill for at least a few hours.
You will need only five ingredients- milk, eggs (a lot of them), sugar, vanilla, and water. Notably, we used half measurements of the video's instructions, because my soufflé dish is smaller.

First, you start a half quart of milk on the heat - it should boil, but only slightly, with some small bubbles around the edges of the milk - not a rolling boil like you are making pasta. Put your milk on medium heat and watch it carefully.
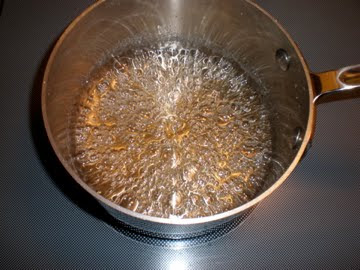
Put about a half a cup of sugar (or 1 cup if you are following the video) into a pan and wet it - you don't want lots of water standing above the sugar.
Put the sugar and water (your future caramel) on medium-low heat. The caramel easily burns, so as soon as it turns a beautiful golden brown color, take it off the heat and swirl it in the air so that it does not burn.
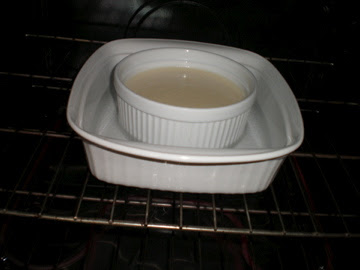
Prepare a bain-marie (a water bath) in your oven. This is easy - find a dish that your soufflé dish will set into, set water to boil, and then pour boiling water into it - to a level that will surround your dish to the 1/3 point or so. The video makes this very easy to understand.
The oven should be at 400F. While your milk is heating and your caramel is bubbling, crack 6 eggs (or 12 if you follow the video) into a large bowl. Our eggs were from the farmer's market, so some of the yolks are a beautiful darker color and stand out from the others.
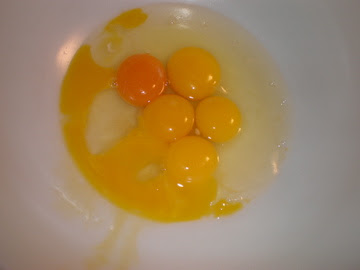
Temper your eggs with the milk (gradually add milk a few times and stir, so that you do not cook the eggs). Beat the eggs until white peaks form. Once the eggs are beaten, add a teaspoon or so of vanilla. I say "or so" because I love vanilla and usually add more.
Your caramel should be done (or maybe it was done already). Take it off the heat, and pour it into the bottom of your soufflé. Gently tip the dish around so that the caramel coats the bottom of the dish and about 1/4 of an inch on the sides.
Pour your egg mixture into the dish.
Place your soufflé dish into the bain-marie.
Close your oven:) Wait for an hour.
Put it in the refrigerator and be sure not to touch it for at least 4 hours. I waited 6.
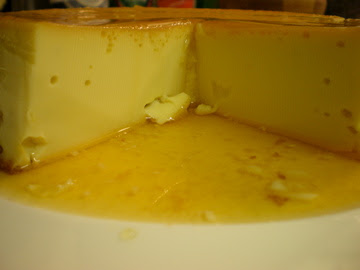
Take out your beautiful crème caramel and sigh at its loveliness.

After this time, take out the dish and cut around the outside of it with a knife, place an upside-down plate on top of the dish, turn it over quickly onto the plate, being careful not to break the mold.
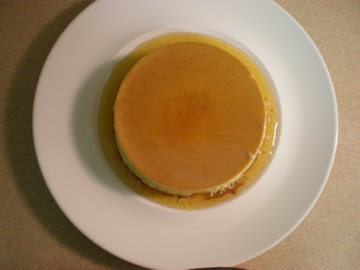
You should have a beautiful crème caramel.
Posted by Sara

You need to plan ahead because the dessert needs to chill for at least a few hours.
You will need only five ingredients- milk, eggs (a lot of them), sugar, vanilla, and water. Notably, we used half measurements of the video's instructions, because my soufflé dish is smaller.

First, you start a half quart of milk on the heat - it should boil, but only slightly, with some small bubbles around the edges of the milk - not a rolling boil like you are making pasta. Put your milk on medium heat and watch it carefully.

Put about a half a cup of sugar (or 1 cup if you are following the video) into a pan and wet it - you don't want lots of water standing above the sugar.
Put the sugar and water (your future caramel) on medium-low heat. The caramel easily burns, so as soon as it turns a beautiful golden brown color, take it off the heat and swirl it in the air so that it does not burn.
Prepare a bain-marie (a water bath) in your oven. This is easy - find a dish that your soufflé dish will set into, set water to boil, and then pour boiling water into it - to a level that will surround your dish to the 1/3 point or so. The video makes this very easy to understand.
The oven should be at 400F. While your milk is heating and your caramel is bubbling, crack 6 eggs (or 12 if you follow the video) into a large bowl. Our eggs were from the farmer's market, so some of the yolks are a beautiful darker color and stand out from the others.

Temper your eggs with the milk (gradually add milk a few times and stir, so that you do not cook the eggs). Beat the eggs until white peaks form. Once the eggs are beaten, add a teaspoon or so of vanilla. I say "or so" because I love vanilla and usually add more.
Your caramel should be done (or maybe it was done already). Take it off the heat, and pour it into the bottom of your soufflé. Gently tip the dish around so that the caramel coats the bottom of the dish and about 1/4 of an inch on the sides.
Pour your egg mixture into the dish.
Place your soufflé dish into the bain-marie.

Close your oven:) Wait for an hour.
Put it in the refrigerator and be sure not to touch it for at least 4 hours. I waited 6.
Take out your beautiful crème caramel and sigh at its loveliness.

After this time, take out the dish and cut around the outside of it with a knife, place an upside-down plate on top of the dish, turn it over quickly onto the plate, being careful not to break the mold.

You should have a beautiful crème caramel.

Posted by Sara
Wednesday, November 4, 2009
John's Fish Dinner
Inspired by reading Julia Child's tales of fish-eating in France, (usually full of butter & white wine references) we decided to cook an experimental fish in similar style guided by intuition...yes, instead of a recipe.
You need: fillets of white fish of your choice, fresh lemon, parsley, garlic, white wine, butter, salt and pepper.
Steps: Warm butter in your pan and sear the fish so it is slightly brown on both sides. Remove the fish to a warm oven. Deglaze the fish pan with white wine. Add a bit more butter, lemon, and garlic to your taste. Simmer and reduce until it is the consistency you like for a sauce. Add salt and pepper to taste. Pour over the fish and garnish with parsley. We served the fish over Israeli couscous, but you could use a bed of greens or grain of your choice.
Our fish in the pan (you should have a bit less butter in searing than this picture shows)

John putting the fish to warm in the oven.

Our reducing fish sauce. You could also add some flour to thicken this, but we went lighter.

John pouring the sauce over the fish

The beautiful result

Our dinner - fish with couscous, green beans, bread...

Posted by Sara
You need: fillets of white fish of your choice, fresh lemon, parsley, garlic, white wine, butter, salt and pepper.
Steps: Warm butter in your pan and sear the fish so it is slightly brown on both sides. Remove the fish to a warm oven. Deglaze the fish pan with white wine. Add a bit more butter, lemon, and garlic to your taste. Simmer and reduce until it is the consistency you like for a sauce. Add salt and pepper to taste. Pour over the fish and garnish with parsley. We served the fish over Israeli couscous, but you could use a bed of greens or grain of your choice.
Our fish in the pan (you should have a bit less butter in searing than this picture shows)

John putting the fish to warm in the oven.

Our reducing fish sauce. You could also add some flour to thicken this, but we went lighter.

John pouring the sauce over the fish
The beautiful result

Our dinner - fish with couscous, green beans, bread...

Posted by Sara
Saturday, October 10, 2009
Sauce
I cooked a marvelous and colorful pasta sauce this evening. Worthy of photos and blogging, but nobody thought of it at the time. Any actually nobody has thought of it at all, until just now.
-- Posted from my iPhone
-- Posted from my iPhone
Tuesday, October 6, 2009
So I called Just Grammy...
 This is going to be a short one, but I thought I'd post because I had a couple of decent photos. So, I've already blogged about our fondness for grassfed beef - albeit leaving out some of the moral and economic justifications for it.
 For more on this, I would refer you to Michael Pollan's The Omnivore's Dilemma.
We buy ground beef the most, for economic reasons, but recently, we decided to try a roast. We bought a more expensive london broil, and also a bottom round roast. This entry will be about the latter.
I'm not very adept at cooking with beef (yet!) so I called Just Grammy, the acknowledged authority on matters relating
to red meat, roasts, and their cousins. Her recipe layed out a simple procedure: brown the beef very well in a dutch oven.
Pour about a cup of good water into the pot - coming up to about a third the level of your roast. Then, roast it in the oven at 350 degrees for your initial hour. The time will vary based on how many pounds you have - we had about 2 pounds, and cooked the roast for around 3 hours. After an hour, we reduced the temperature to 250.
While your roast is cooking, cut up an assortment of vegetables - we use carrots, onions, and potatoes, for a basic roast. I think we will broaden to incorporate a greater variety for our london broil. About 45 minutes before the roast is done, put the vegetables in around the roast and continue to cook. Around the time your roast is done, the vegetables should be tender.
One note on grassfed beef - it tends to be less marbled than what you buy at the store, the natural result of actually eating what cows are meant to eat. That said, it would be a good idea to tenderize your roast prior to cooking with whatever method suits you, to increase its tenderness when removed from the oven.
You can reduce your broth on the stove after the roast is taken out and add some red wine, salt and pepper, and whatever herbs you like. While reducing, deglaze by scraping the bits from the bottom. Pour this reduction over your roast.
All said, it was a tasty meal and perfect for early fall.

Posted by Sara
Subscribe to:
Posts (Atom)